Showing posts with label plant stands. Show all posts

Saturday

A Jazzed-Up Speaker's Podium


 Laura had seen me at the Syracuse Arts & Crafts Festival  and wrote  me a few weeks later to ask me about a really cool idea she had.

Laura is a high school English teacher and had a vision of creating a special space where her students could read their papers/speeches from.

She had gone online to price out a few stands and soon discovered that they were a lot of money for just wood.  Nothing stood out to her as unique or fun, so she thought perhaps we could build her something.  She has seen pictures of our dog food storage boxes and thought perhaps we could build something for her classroom.

With notebook & camera in hand we went to Home Depot to do some brainstorming.  After laying out many different projects/ideas in the isles, our design really started to take shape when we saw this column.  I wrote her with our final thoughts that night and by the next day we were back at the store finalizing our plan.

These were the items we left with.


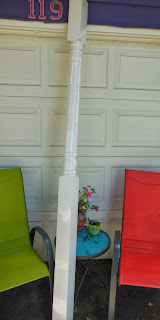
We purchased the decorative colonial house beam first.  I loved the scoops and loops, rings and things and figured I could do a lot with it.  More so than just the fence beams we had originally thought of, and much more feminine that just building a box.  We knew we'd have to cut off a lot to make it the correct size but even with that, it still had more to offer design wise.


We then found these great pre-cut circles for only $5 a piece! What?! Can you say Jackpot! 

We also purchased L brackets, and bookshelf brackets to cover the L brackets after we connected the post to the base.

We also knew because the top circle would be at an angle there would need to be something that would keep the paper from sliding off.  We had tried a variety of trim pieces, but nothing seemed to go.  Then I had an epiphany-yes, right there in Home Depot!  I would use a Scrabble letter holder! Perfect, right?!


We measured the height and then made our cuts.


Then we secured the post to the base.


Then attached the pre painted shelf brackets to hide the hardware.

We then needed to attach the top.  Now, because this was going to be used by teenagers we knew we'd have to secure it pretty darn good. Which meant we'd have to screw it into the post as well as glue it.

The thing was I wasn't trilled with the idea of having screws in the center of my art piece and I wasn't excited about the prospect of covering them up with wood putty either.  There had to be something more...decorative.


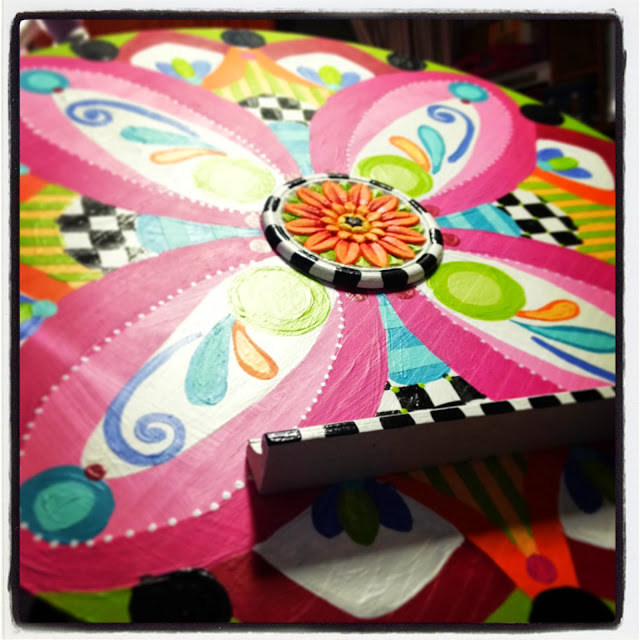
Then I found these!  For just $2 at AC Moore I found my answer.  I would screw the disk into the post then cover it up with this applique-BEAUTIFUL!


After the center piece was secure, I then glued on the Scrabble letter holder and held it in place with painter's tape until it was dry.


I finished painting the piece and added Laura's chosen quote to the front.

"Go into the world and do well. But more importantly go into the world and do good."

This was the final piece. Front and back.


This was the first project we'd ever done like this and I have to say I was pretty pleased with the end result.  I'm hoping her students will love reading from it and perhaps it may take their minds off, if only for a minute, of the terrifying task of public speaking.

Here are the next two pieces on deck.  Can't wait to get started on them!


Sharing with these crafty blogs:


Tuesday

MKC Squared


How many of you made New Year’s resolutions last night? Okay, I’m raising my hand too! Glad to see I’m in good company.  I have a lot-A LOT! For business and personal. Like thousands of Americans what tops my personal list (pretty much every year) is losing weight. 


BUT as far as my business one…this year it’s writing. 

I have two romance novels in the works (one completed, one cruising a long) I’m also illustrating a book of poetry with my teenage daughter (when we started this project things were light and airy but the more I lose her to teenager land the more Gothic and dark things become, so I might have to wait till she grows out of this).


 I’m also working on an e-book about painted furniture (Guess you didn't see that one coming).  Not sure who would buy it, but it isn't necessarily about the money-it’s just a goal of mine-and if I make money doing it-icing on the cake (see full circle back to my personal goal-food reference alert). 

Another writing goal; keeping my blog current, which means posting at least 2xs a month, hopefully every week. I’d also like to do more tutorials-I’m all about sharing my secrets (If you ever want to know how to achieve a certain look, let me know, I’ll tell ya!)

So, without further ado here is my first post of the New Year, a short tutorial no less. Seems as if I’m headed off on the right track-Let’s see how long I can keep up with this goal :D

I had a client find me through a previous customer.  With all the craziness of the holidays though, I forgot to take a "before" picture. Obviously, you can see I remembered after I had applied the first coat of paint.


This fantastic lady wanted courtly checks, just like that famous black and white check designer we all know and love! Well, to be honest, I had never duplicated MKC’s black and white courtly checks.  Sure, we've all done black and white checks, but just like MKC? I was nervous, but I never shy away from a painting challenge. So, I said sure, I’ll do it.  She had several other pieces at home that she wanted to match this little plant stand too.

This is how I did it, if it helps great! First, I painted my base coat in a cream color, then I mapped out my squares.


Once the base coat was dry I colored in the alternating squares with one coat of black.  While the black was still wet I poured my blue and gold paints into a small container (I probably poured way too much in, I tend to do that, but you only need a dime size) remember you’re only using a tiny bit.  You’re trying to create the streak; you’re not full on painting.


So, with a dry brush dip your end in a little bit of blue and gold. 


Then streak it through the black paint.


Now, what you don’t want to do is try and keep streaking it, because then you just get a green square, like this.  


Easily corrected though, just go back in with a little more black to cover it up.  Again, the trick is not to use too much paint and have your streaks go in the same direction on every black square.


Then go into the white/cream squares and drag a little gold going in the opposite direction of the streak in the black square. You don’t have to do every square, sometimes less is more.

When finished your top should look like this. I must give some credit to my friend Lucy from Lucy Designs, who shared some of her techniques with me too.  See ya'll, share the love!


To fancy it up a bit and make it more MKCish, I decided to paint a finial and some small wooden balls to add to this piece.  I always feel like a good finial adds whimsy. 


This is the final product. 


      Have a wonderful 2013! I’ll be seeing you soon with even more inspiration and tutorials.  If there’s something you’d like to see shoot me an email and let me know-I’ll try really hard to put it up!  

And hey, while you're waiting for the next post why not follow me here at my other spots! Pinterest, FaceBook or Twitter

Thanks again for all your kind words and accolades, they really make my day!  Much love and peace friends! Let this New Year ROCK!

Happy Painting, Mary


Sunday

Patriotic Plant Stand

Recently, my friend Gina asked me to revamp an old highchair she had been storing in her basement. She wanted to turn it into a funky place to showcase her plants. What a great idea I thought, “A plant stand!” How many times do you see a cute highchair at a garage sale or thrift store, but you think…“What the heck would I do with that?” Well, now you know!


From the moment I picked it up I knew I was going to have to remove this cute lil’ doggy decal that was on the back, it seriously had seen better days. I tried scraping it with a razor first, but it wasn’t budging. So, I took some stripper (Peel Away 6; Paint & Varnish Remover), saturated the sticker with it, let it sit for a few minutes and waited for it to bubble. Then took the razor to it again and it came up like butter.


Once I had removed the entire sticker and all its residue, I gave the whole piece a good cleaning with some soap and water. I then put wood putty in all the small cracks and holes, sanded and primed.


Gina had pretty much given me free reign over design but she did give me one stipulation, “Make it patriotic!” So, red, white and blue is what I did!


After I laid down the base coats, I started with the stripes. On this piece there were 3 different sizes. I usually always use tape when striping. For really thin lines I use auto detailing tape. You can buy it at any auto supply store. For larger stripes I use either Frog or Scotch Blue tape usually in 1-2” strips. Both are good, but both tend to bleed. Not a problem though, I just go in with a little brush and touch up the bleed marks at the end.


See, I usually use 3 different size brushes in a 3 step process. First, I use my Purdy (love, love, love, my Purdy!) to cover the large areas and get a solid base coat. Then, I go in with a medium brush closing in the gaps, laying down the design and filling in the color. The final go around is with a tiny brush for all the detail work.


Once the painting was finished I added the wood appliqués for whimsy (also to cover some unsightly screw holes in the rear) and wrote the word “LIBERTY” across the back to finish it off.


I usually finish my pieces with a spray coat of lacquer. This piece got extra coats of Poly Lacquer (brushed on), because it was going to be used as a plant stand and I wanted to make sure the seat was sealed extra good (just in case water spilt on it).


So, what do you think? Does this seat get your vote? And how do you like Gina’s creative idea to turn this highchair into a funky plant stand? What would you have done with it? I'd love to hear your ideas...let me know!


Happy Painting!


Mary