Showing posts with label garage sale make overs. Show all posts

Friday

Miniature Table for 2


Hi creative friends!  

It's been a little bit since I last posted but please know I have been VERY busy! Our Etsy Store has been booming!  So, that means I haven't had a lot of time for custom  orders.  I miss painting furniture so much! I truly do.  Don't get me wrong painting the smaller items in our store is fun, but furniture is therapeutic and gets my creative mind moving.  I'm working on a bunch of other pieces right now, so hopefully I'll have more pieces to post very soon.

We first did two tables for Mike (are wonderful friend from the paint store) a couple of years ago.  They wanted these two missed matched pieces to come together with a fresh and funky look for their daughter who was getting her own place.


Once finished they looked like this.  The pictures aren't that great, we remembered to take them just before they picked them up, but you sort of get the idea.


Now they were ready for their 3rd piece!  Love these people!

This was the inspiration piece. The patterns didn't need to be identical but they really liked the color palette/combination. 


You can't see it in the picture below but the leg on this piece had been repaired at one time and had now come apart again.  We tried to fix it with Gorilla glue, but it didn't work.  We had to remove the leg, scrape the old glue off, nail it back into place and then secured it/ sealed it with a wood epoxy. It was quite a project, but after it "set up" it was like new.  When that was finished, we sanded the entire piece and primed it with Bullseye 1-2-3 primer from Zinsser, twice.


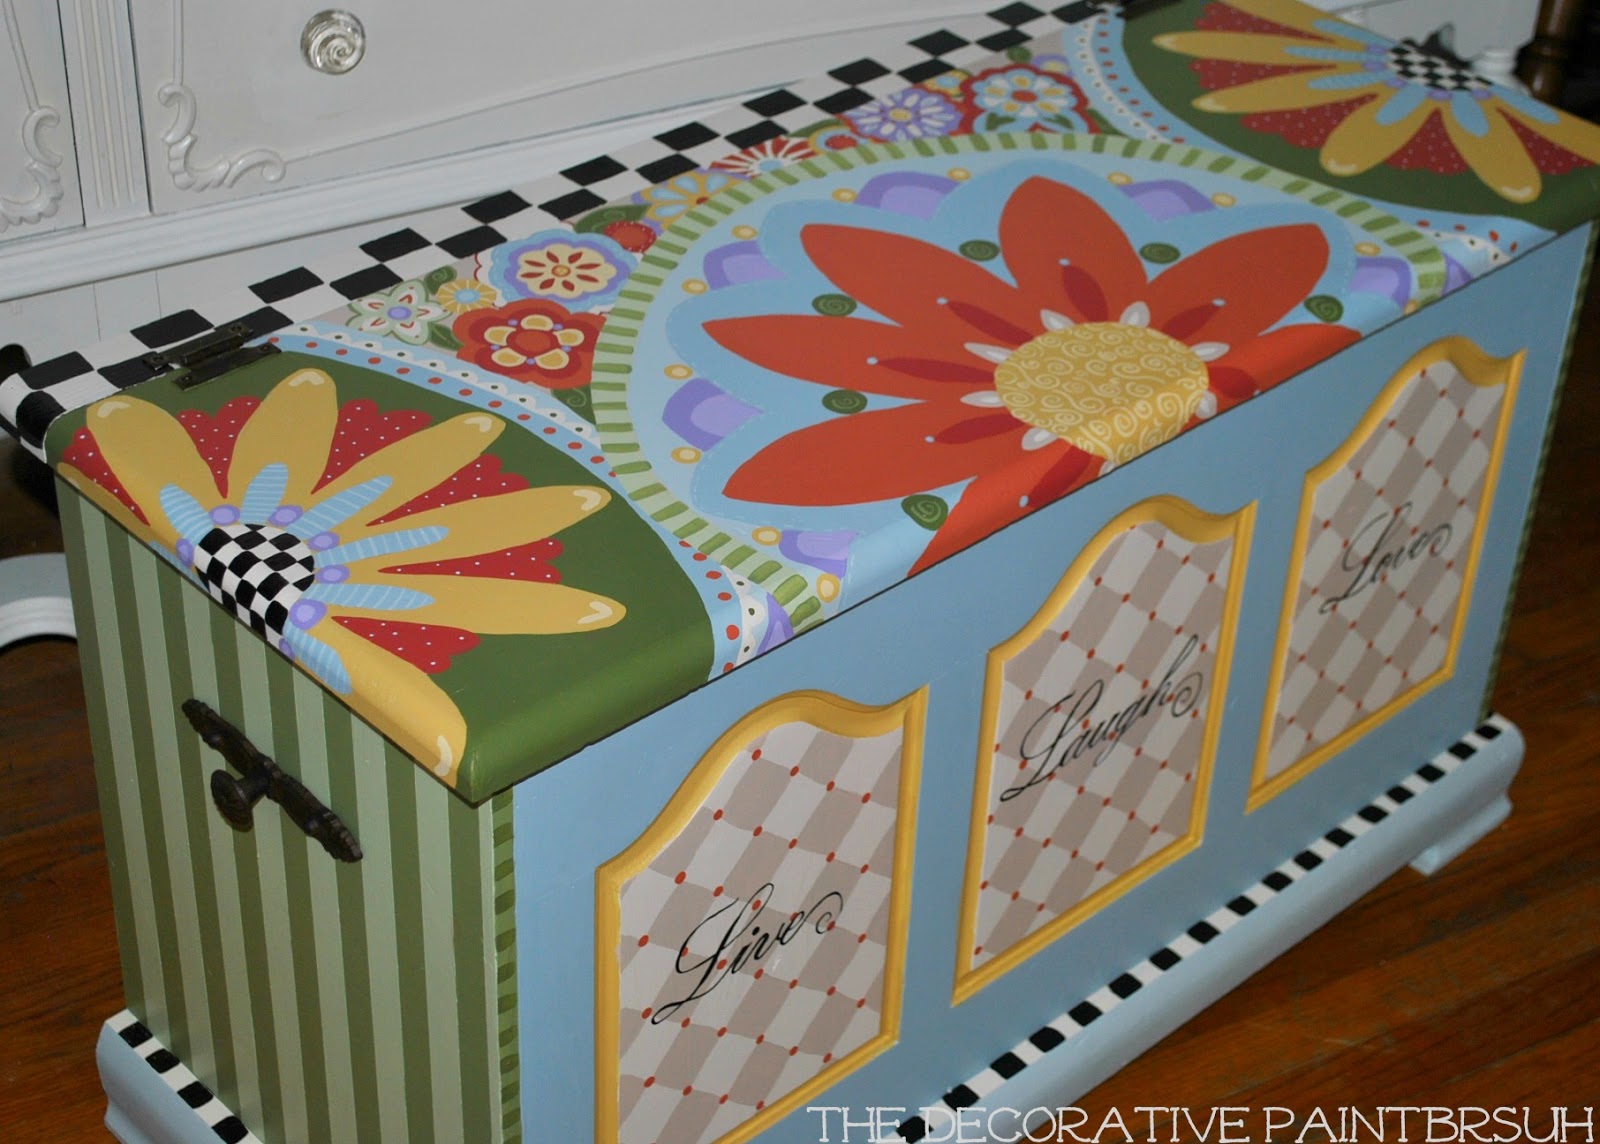
 The final piece looked like this.


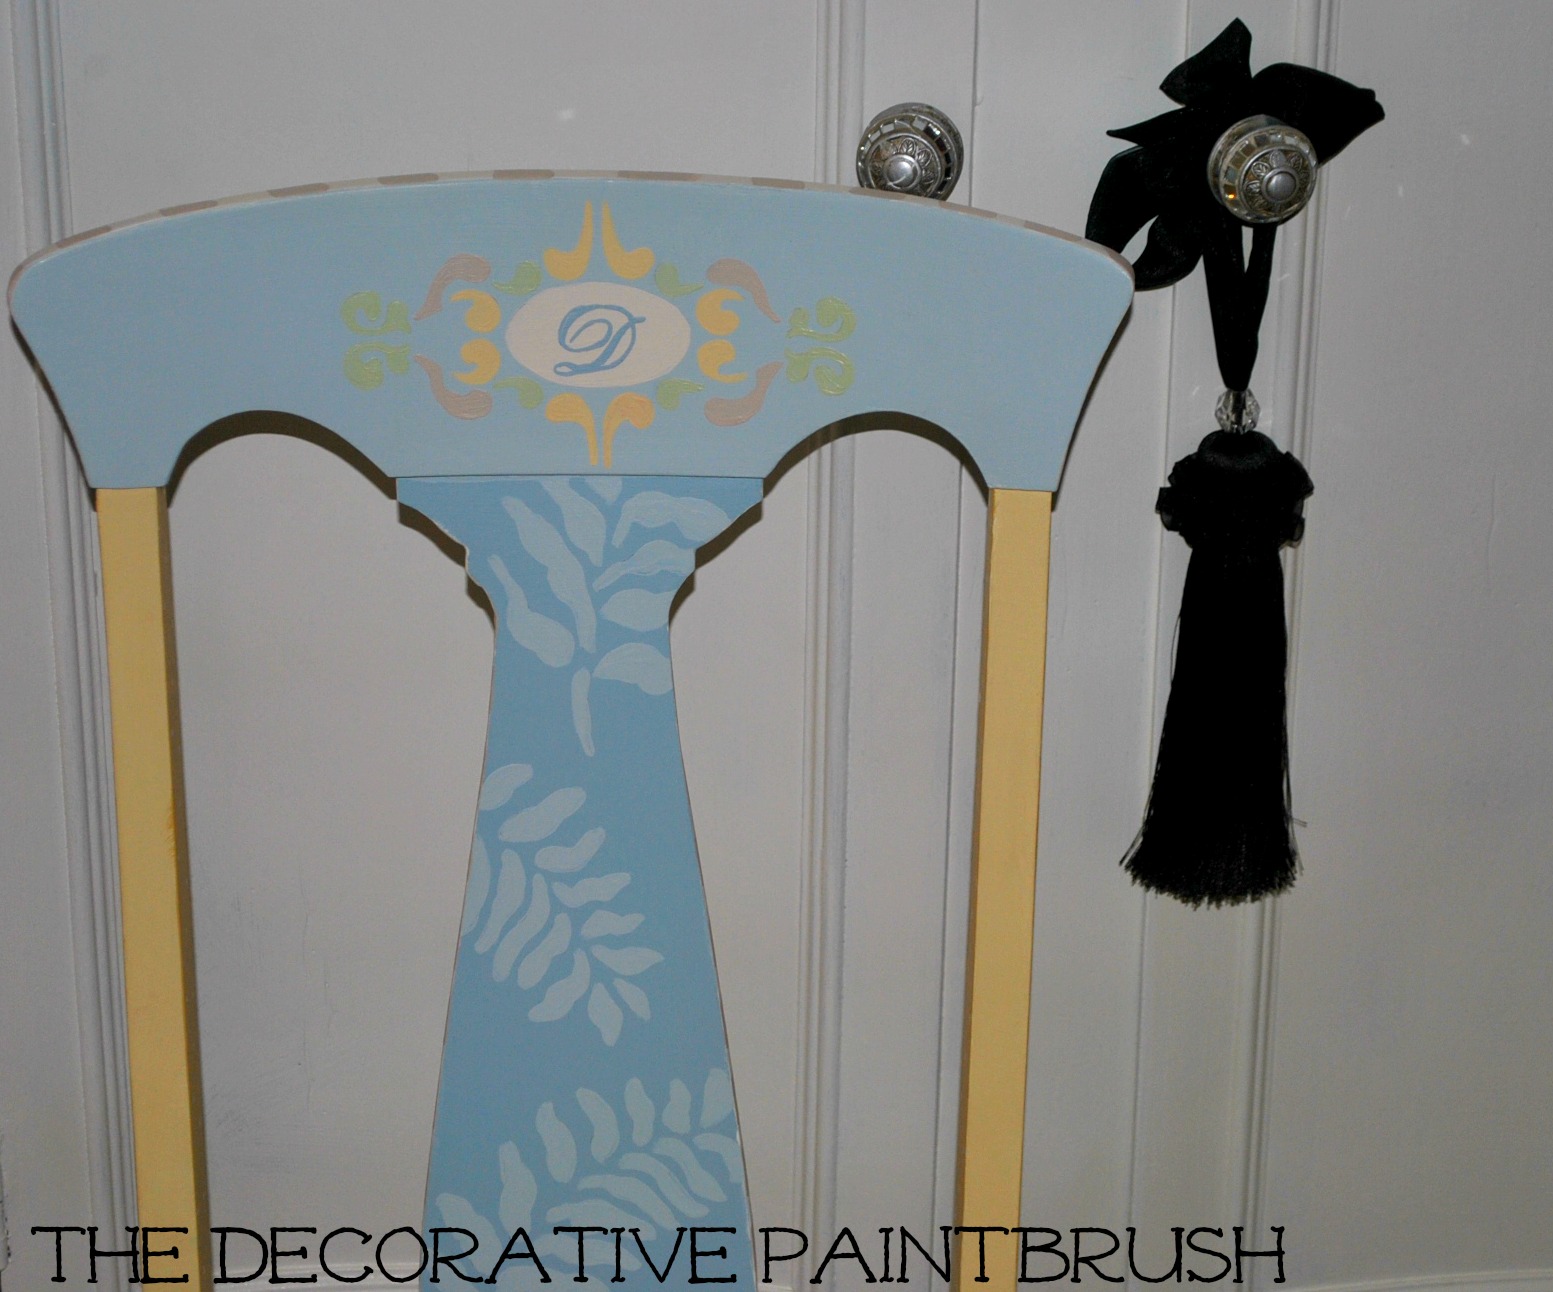
The matching table is on deck next.  It's a bigger project then this smaller one.  Here's a sneak peek!


I'd love for you to come join me on my other pages:  Pinterest FaceBook Twitter and Instagram Let me know you're there and I'll follow back.  I get so inspired by all of you!

Thanks for following along here!  


Monday

Fun Little Painting Projects

These are just a few more "smaller" items that we created for the Syracuse Arts & Crafts Festival, then I promise, I will shut my mouth and close the book on this show.  

That is....until next year!

First up, this cute little toy chest (tire not included)!  
This was actually purchased from Micheal's Craft Store.  Not sure if they are even in stock anymore, but when I saw it, I knew it would be a wonderful addition to our craft show merchandise.


It was sort of plain on the front so we added the plaque for some visual interest.  Then I decided to do owls and birds across the front, because lets face it, who can resist little woodland creatures, right?  
Plus, owls are BIG this year people!  I sold out of all my "owl things" the first day at the show!  
So, paint an owl on something and it's sure to be very lucrative!


Next up, was this adorable school chair!  

Last month my friends and I went down to the Everson Museum's annual Flea Market.  We had a lot of fun!  I was really stoked when we found this pair of chairs salvaged from The Syracuse City Schools. 


The one on the left was in mint condition-the one on the right-we're still nursing back to health.  

I painted it as if I were painting a seat for my own little girl (who is older now, and probably wouldn't even fit in it or paint it purple with flowers for that matter). But I pulled out the purples and pinks anyway! 

As always I used Benjamin Moore paints; 

I free handed the flower design on the top and coordinated with matching patterns.  The end result...


And the next piece was this remake.  

I didn't take BEFORE pictures! I really wanna punch myself in the face when I do that, but I still wanted to share with you the end result.  So, close your eyes and imagine with me...

It was a cold dreary night as Maggie and I headed down an old dirt road...no, not really, but I was just trying to create a little bit of drama while you had your eyes closed.  

No, we actually found this piece at a good old fashion garage sale. It had a large, unsightly veneer piece around the table top, just underneath the lip, which was split and chipped.  We immediately pulled that off.  Then the feet were broken, with only one large claw foot making it very unstable.  So, we sawed off the one remaining foot , which made it balance correctly.  


I then added a finial in the middle to secure the legs in place.  There had obviously been a piece there but it was now missing-so voila-an instant center piece from my basket of finials!


Okay, so that's it-for the 2013 Festival!  But, don't be too sad because we have more items on deck (or on my dinning room table I should say).  We have a couple antique rockers, a few LARGE mirrors, a desk, a dresser (although that's not ON my dinning room table, just beside it) and so much more (and yes just in case you're wondering my dinning room is a part time storage unit).


Friday

A New Family Heirloom


I get excited whenever I have the opportunity to take something old and worn, and turn into a beautiful heirloom.  I especially love when someone challenges me with a color palette that I normally don't work with.

Benjamin Moore Paints

Now, I must admit when Diane first gave me her color palette I was a bit perplexed as to how I would make them all come together into one cohesive piece of furniture. As with anything that is out of my comfort zone-I procrastinated.

When I’m stuck, I always go to my Pinterest page first for inspiration.  It has thousands of painted pieces that I've collected, that I often refer to, to get my brain moving.  
Although, there is a variety of pieces on this page I am often drawn to a particular “style”. One such furniture artist that I admire, A LOT,  is Linda, from Funky Furniture.   I love the way she uses flowers as funky design elements.

Table by Funky Furniture
They are sort of like “Mandalas” Mandalas are very spiritual forms of design. 


I've used a Mandala once before in another piece (see the tutorial here) and knew I wanted to try it again. 
So, with all these different components coming together I knew I had what I needed to create a uniquely designed piece for my customer.


While I was at it I finished a chair for her as well. It used a similar color palette.  


The chair was a bit simpler, a bit more feminine, but would fit perfectly in her bedroom. 


Do you have a piece of furniture that you've redone recently? Post it on my Face Book page so that we can all be inspired!


Wednesday

Loving Pink


I work with a lot of different color combinations. One of my favorites; pink, green, black & white.  I’ve used it on this redo and this piece, plus this end table as well.  I just love how the colors complement each other, so I decided to use it again on this piece. 


If you remember, I found this piece on a recent trip to Gothic City Architectural Antiques in Buffalo.  I purchased it for a steal. Probably because there were some items that needed to be fixed on it. The drawer for starters, it was warped inside, so we needed to replace the wood.


 Then the bottom panel was pretty loose, but after further investigation I discovered it was pretty rotten, so that needed to be replaced as well.  The top was rough and needed to be puttied and sanded too.


 But after the repairs were made and the piece was primed twice, it was ready to be painted.  I hadn’t done a real full blown girly piece in awhile, so I was excited to get started. As always, I started on the bottom and worked my way up. I’d recently seen on other blogs that people were incorporating numbers into their pieces, and although they were “shabby chic” pieces, I liked the idea of adding numbers (as well as words) to my project.  I decided to go with the number 67.  Why, you ask?  Ummm…best year EVER!


I wanted to create a shadow around the outer edges of the inner circle, just to separate it from the busy background.  Once the lighter green was dry, I applied a darker shade with a paintbrush in the areas where I thought a darker shade would look best.  


While the paint was still wet, I dabbed at it with a small wet piece of a kitchen sponge.  Don’t wipe it off, rather gently sponge the paint outward till it blends with the darker color.


 I did this on the outer edges of the circle, as well as, in the middle and behind the numbers creating a 3-D effect. 

I used this same technique on the rose, on the top of the table as well. 


I worked up the legs with fine detail 


and added hot pink flower appliques to the sides.  


This was the final piece!


The next project…


 These two fabulous end tables! Fabulous? Yes, trust me, they are, or rather turn out to be pretty cool.  I did something completely different on these.  So, stay tuned for my next big adventure!


Sharing with:
It's a Hodge Podge Life                   Truly Lovely                          It's So Very Cheri
Finding Fabulous                             Petals to Picots                     Create With Joy
Miss Mustard Seed                         My Romantic Home              Oh So She Says
PJH Designs                                   Tatertots and Jello                  Domestically Speaking
Joyful Stamper                                Craft-O-Maniac
Night Owl Crafting                          Mad Skills Party
The Answer Is Chocolate                Pinkapotamus
Ladybird Ln.                                   Boogie Board Cottage
Happy Hour Friday                         DIY Home Sweet Home
Becoming Martha                           Keep It Simple