I saw this idea once on another blog (it was a while ago and I don’t remember where I saw it otherwise I would give props I swear and if you have it on your blog please connect the link somehow) and always thought it would be cool to transform an old frame into a family organizational center ever since then. So when I saw this single mirror, unattached from its dresser at the local Rescue Mission, I knew I had to have it! At $5 it was total steel!
The first thing we did was remove the backing. Then we popped out the mirror and replaced it with luan. We chose Luan plywood because it is more lightweight then regular plywood and since the frame itself is heavy we wanted to elevate any extra weight wherever we could.
Just a side note: Lowes is really nice about cutting the wood to your specific measurements, so if you don’t have the equipment at home to cut it just have them precut the wood for you and it’ll be already for you to insert when you get home.
Okay another side note: The next time I do this project I think I will paint the board separately from the frame then attach the two pieces at the end but we were so excited to see how it looked put together that we assembled it first. This made it harder to paint along the inside edge, for both the frame and chalkboard. Dugh?!
After one coat of primer we applied two coats of Benjamin Moore Baja Dunes as the base coat to the frame and waited for it to thoroughly dry before we began the faux.
So while that was drying we started on our magnet/chalkboard. Before we had screwed the wood on we did manage to sand it down smooth but did forget to prime...oops! LOL! Can you tell we were excited about this! I’m surprised I remembered the pictures! Grrrr! Don’t you hate when you do that, forget a step!
ANYWAY! The surface was smooth and the first coat (of 4) of the magnetic paint went on nicely. It took many coats of magnetic paint to create enough hold to secure even the thinnest magnet, even though the directions say 2 coats are enough. If you wanted to use larger magnets I’m thinking you would have to apply even more coats of the paint. And you can only use one coat of regular paint/chalkboard paint over the top because that too cuts down on its magnetism.


After a couple hours the frame was dry and I decided to start on the faux. I went back in with Ralph Lauren Glaze in Tea Stain ($3 on sale @ Home Depot, which stopped caring it so I grabbed the last cans they had!) and distressed it. Honestly, it looked okay, but I wanted something darker I think, so I went in with actually stain for a more richer, deeper discoloration. I dipped my rag in Minwax (Mahogany) and rubbed that into the sunburst and around the edges for a more weathered look. Then I took gold & bronze Artists Metallic paint and dry rubbed that over the tops of the sun bursts only, just for added effect.

Have you ever used Google Translate? I love it! You just type in a word, a statement, poem or phrase and translate it into one of 20 different languages. I wanted to bring some of the black into the top of the piece to balance out all the black in the middle and bottom, so I thought a cool French statement across the top wood be just the thing I needed. “Life is a Journey” was the statement I chose and once I traced it on the top I painted it in with black paint balancing it all out.
Once the outside was finished we put the last coat of chalkboard paint on the center and conditioned it.
Third and final side note (promise!): If you don’t condition your board the first thing you write on the chalkboard will be “burned in” so to speak. Although you’ll be able to wash it off you’ll always be able to see it on the board. So here’s how you condition: Take any old piece of sidewalk chalk and rub it all over the entire surface of your chalkboard. Make sure that you cover every inch thoroughly with the chalk. Once that’s done take a wet cloth and wipe it clean.
Now onto the bling! I bought a bunch of different knobs from Hobby Lobby (when they where half off). I staggered them in style and size along the bottom to create a “just found” look. I chose smaller knobs to offset the hook on the side for extra storage.
Once we screwed the knobs in we discovered we needed to cut the back off of the screws in order for the frame to lay flush against the wall. Heavy duty wire cutters did the trick.
In order to hang this piece the hardware had to be strong. It did not have hardware from its previous life as a mirror so we had to put our own on the back. We drilled 2 hooks (eye screws) into the back of the frame and ran heavy duty wire through them, securing it around each loop.
We now have a fantastic, functional piece of art for the home that can cost you next to nothing to make. The magnet & chalk board paint are on the more expensive side ($20.00 per qt.) but you only use a little bit for this project and will have plenty left over for many other crafty things. So, get creating people! I know I can’t wait to make another organizational center again, just picked up another lonely mirror this weekend!
Happy Painting!
Mary
I'm sharing this with my friends that are listed on my party page. Find it here.

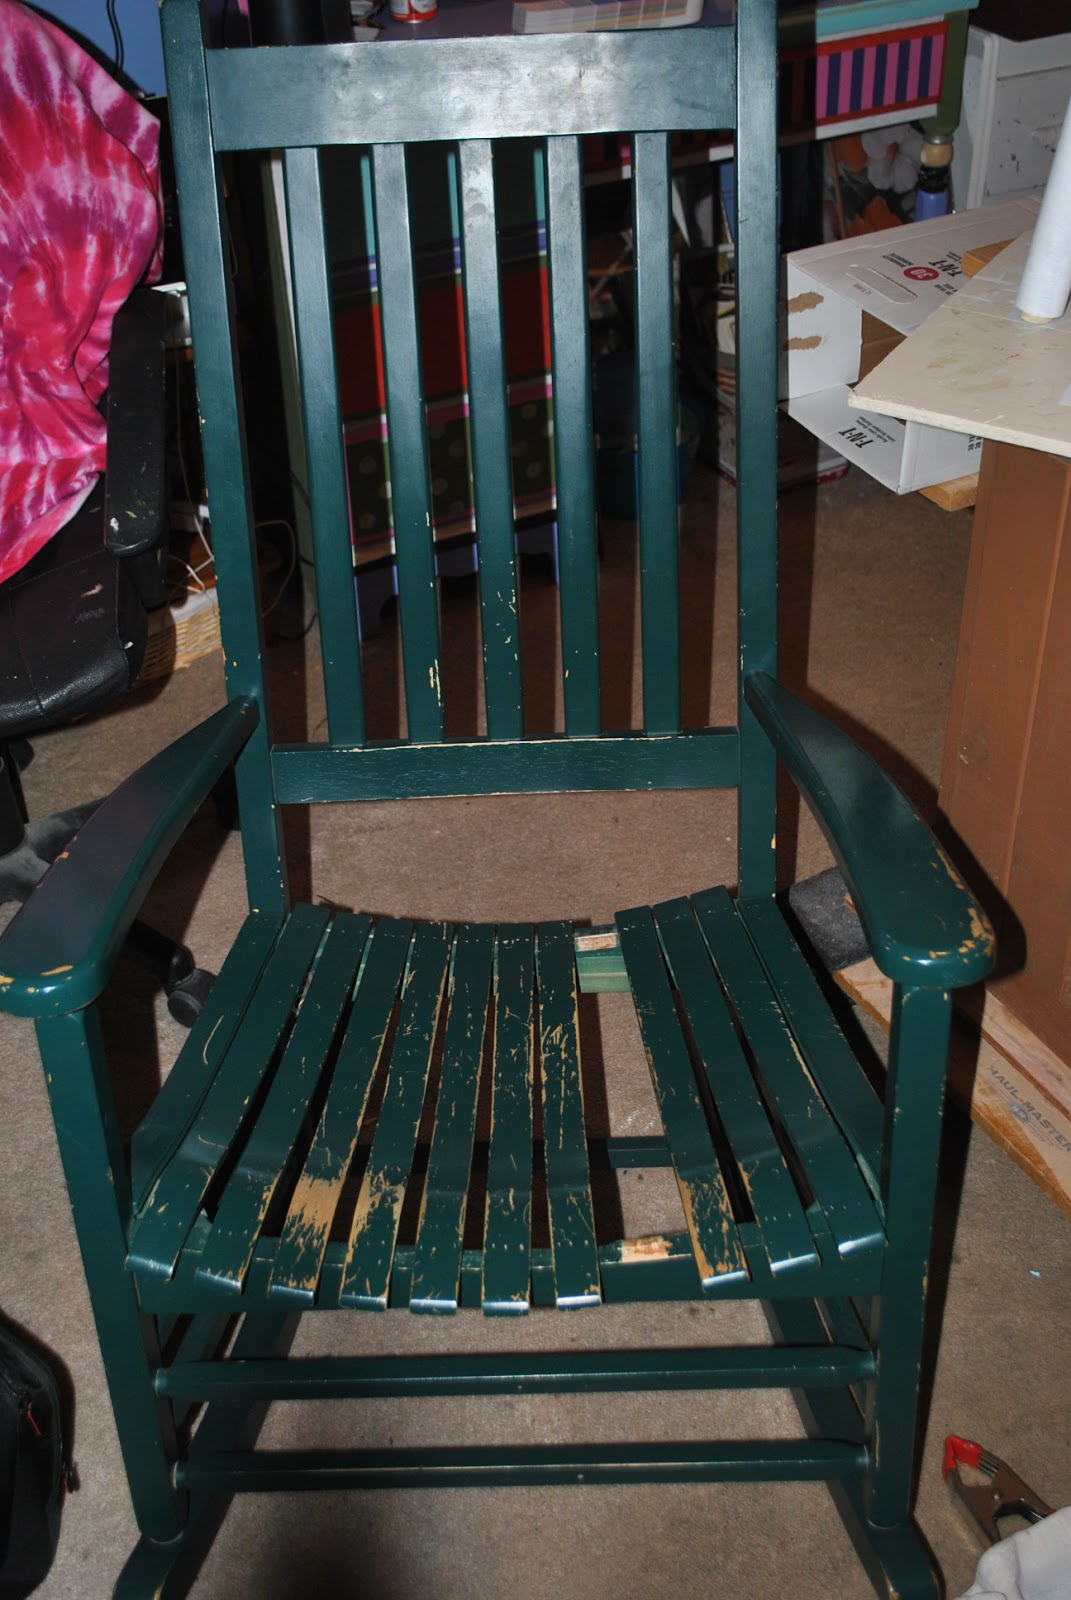 Here’s that rocking chair I've been squawking about all
over town! When I picked it up from my
friend Karen’s second grade classroom it was, shall we say, in dire need of
some lovin’! Or maybe that was the
problem it had been “LOVED” to death. I’m sure it had been in her possession for
quite some time, either that or her second graders are a pretty rowdy bunch
(which, if you've ever experienced a second grader, you know it's a distinct possibility).
So, she contacted me for an upgrade and you all know I never shy away from a good challenge.
Here’s that rocking chair I've been squawking about all
over town! When I picked it up from my
friend Karen’s second grade classroom it was, shall we say, in dire need of
some lovin’! Or maybe that was the
problem it had been “LOVED” to death. I’m sure it had been in her possession for
quite some time, either that or her second graders are a pretty rowdy bunch
(which, if you've ever experienced a second grader, you know it's a distinct possibility).
So, she contacted me for an upgrade and you all know I never shy away from a good challenge.


