Showing posts with label home decor cheap. Show all posts

Wednesday

Gothic to Gorgeous


Do you have a favorite place that you “FREAK OUT” about going to?  Like, if you had a ton of money you would probably buy EVERYTHING in the place? Or you could just walk around for hours and still not take everything in? I actually have a variety of places that could fall under that criteria, BUT the one that tops my list is Gothic City Architectural Antiques in Buffalo, New York. At least once a year, my friend and I make our way up there and never leave empty handed.  This is what the place looks like when you first walk through the outside gates.


Ya, I know! Awesome! Right!  Hahaha! We found it by complete chance.  We had road tripped it up to Buffalo in search of another antique shop, when we passed this little gem and went, “What the hell was that!” We immediately turned the van around, parked and walked through the gates. At first we just stood there and looked around.  For us it was like standing at the pearly gates! 


When I say pearly gates. I mean pearly gates too! Look who was there to greet us...


Now, if that's not a sign I don't know what is!  
Then there was this sweet architectural gem...


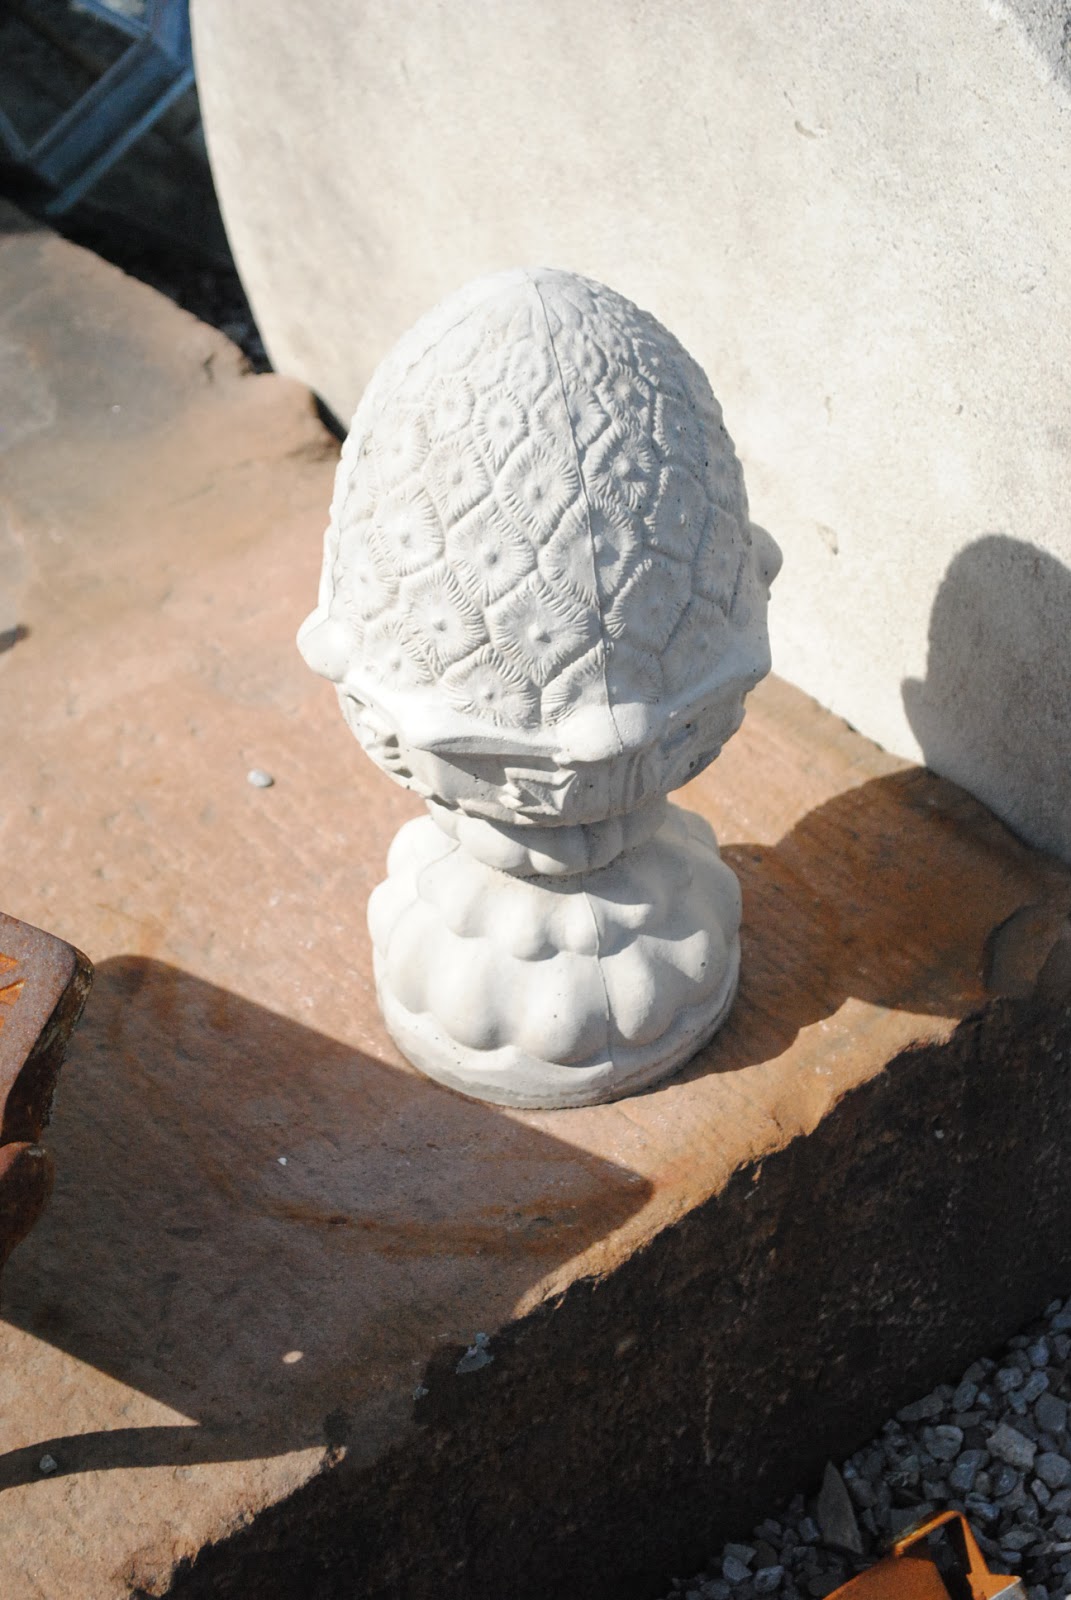
Just fabulous pieces, a little out of my price range (Although, I did carry this "egg" around for awhile until I traded it in for somethings else) but they are owners are good at haggling prices with you, if you really want it.

Now, once you move past the outside salvage area you enter into a small back door around back, as if you're going into someone’s storm basement.  That's when you realize you're not in Kansas anymore, and your mind has a complete orgasm over all the STUFF that’s inside! It’s incredible.  Rooms full of furniture, full of shelves, full of nooks and crannies, chuck full of beautiful antique type salvage! From door knobs, to hardware, to windows and doors, to hinges and plates, to light fixtures and moldings-you name it and I guarantee you’ll find it there.
So, in the converted building (I believe it was a temple or sanctuary) there are 3 floors, floor to ceiling, jam packed full of stuff.  Then in the adjacent building there’s MORE flipping stuff!  I had my camera with me inside, but I was so enthralled with all the incredible merchandise around me that I actually forgot to take pictures! Ugh…I hate when I do that.


And after all that searching, imagining, admiring and drooling, this is what we came home with...


Okay, I know, it’s not a lot, but like I said in the beginning, “…if you had a ton of money you would probably buy EVERYTHING in the place.”  ABSOLUTELY!

I’m going to use the table legs for a variety of things. Converted coat racks, polls for my decorative bird houses, and a slew of other things.  I bought key plates, two small pieces of furniture AND more legs! That was the high light of my trip (I know BORING! The high light of my day is collecting table legs!)

On our way back through we stopped at this amazing store as well. Craft Company 6 in Rochester is a feast for the eyes! With all its eclectic art work from artisans’ and crafts people, this colorfully, energetic spot, will certainly entice your senses. 


So, if you live in Upstate NY. And you just happen to be on your winter break, wondering what to do… Do yourself a favor, take a road trip to Rochester/Buffalo and check out these amazingly creative polar opposites!  They are sure to get your imagination rolling!

Happy Painting! Mary


Friday

2011 in Review: Our Top 5

As 2011 comes to a close, I thought I’d jump on the “year in review” band wagon and give you a look at my top 5, “most viewed” entries for the year.


Number 5:  Garage Sale Loving


I took this fun little piece and transformed it into a funky entryway table. It sold this summer at The Syracuse Arts & Crafts Festival.  It was the first time I had attempted a landscape motif on a piece and I must admit this turned out to be one of my favorites!


My friend Krissy will be glad to know that her daughter’s dresser made the cut!  This piece is actually one of the highest “repined” items on my Pinterest page-it shows up all over-and for that I am honored! I’m hoping I will have the opportunity to get to some larger pieces again this year!


I've had a lot of people affectionately call this my “Toy Story” table, and you know what, I like it! If my babies were still little, this would proudly be displayed in their room, but alas they are teenagers, dark & Gothic, teenagers, gone are the days of Toy Story and bright colors.  Even so, I personally L-O-V-E this table and its primary color pallet, cow print meets floral...it just ROCKS!


Great piece, but boy, was my hand tired from painting in all those zebra prints on the back! Perhaps that’s what prompted my carpal tunnel surgery this November? Hmmm…

I really liked the blue on blue and the red on red (I did a linen weave faux on the top, which didn’t come out all that great in the picture, but looked really cool in person) then did a gold metallic Polk-a- dot on top-SWEET! Then the feet...Shut the front door! They were fencing post toppers-love it! Sold this piece to the same person who bought number 5! Ya baby!


Funny how the number one, most viewed post on my blog for 2011 isn't even furniture! BUT STAIRS!  

As many of you know The Decorative Paintbrush is a 2nd business for me. Although this year, and hopefully in 2012, it will become more of a full-time career for me. My partner and I own another business called 2 Women and a Paintbrush We do all kinds of painting in & out of people’s homes-as a matter of fact, if you've ever read my bio, you’d know it’s really how TheDPB was born.  
Anyway, we were commissioned to paint & stencil a customer’s stairs, and although we have a blog for 2Women and a Paintbrush because I loved how these looked I wanted to share them here as well! I’m so glad I did because it turned out to be the most highly viewed post on my blog since we started in 2009! Too funny, hugh?

Well, I hope you all have a wonderful, safe & happy New Year! Thanks for being a part of my world this year! Your comments are always so uplifting and inspiring! Can’t wait to get painting again-lots of great stuff on tap for 2012! Remember to come follow along on FacebookPinterest or Twitter
Be safe! Big hugs & much love! PEACE!


Saturday

Heather's Gift


Two years ago my friend Heather was moving to Boston and asked me if I’d like this cupboard that had been in her basement for awhile.  She had warned me that it was in need of some serious TLC, but you know me…. furniture, TLC….sigh, I love a challenge! Little did I know though, that this piece would be one of my greatest make over’s. At least as far as before and after goes.


There was a lot of prep work that had to be done to this piece.  We had to remove the back, the inside bottom piece and replace them both with new wood. We had to add new shelves because the old ones were warped and had to replace the weathered hard ware. We scraped loose paint, than primed the entire piece, twice. But after so much prep work for some reason, it just got stored away. I think I was exhausted :D

But recently I was asked to donate a piece of work to the William Johnson Scholarship Fund and I thought… Heather would be so please to see this piece donated to such a worthy cause, so I dug it out of storage and started painting.

The school colors were black, white & red, so I went with that theme, which was actually harder than I thought. You know me, I kept wanting to add COLOR (which I did a little bit…can you see the hint of green, lol, I just couldn’t help myself, I know I have a problem!) but all in all, the black and white was the overall theme.


I added funky knobs and tassels to give it some extra punch.


I'm hoping this piece does well at the raffle and I hope I made my friend Heather proud with the transformation. It’s in her honor that I give this piece to charity.

Last month my dear friend was diagnosed with malignant gliamo. She is fighting hard and facing this monster with great strength and grace. The two birds on the front are a symbol of our friendship. Please keep her in your prayers
Life is short people. Make everyday count and most importantly tell the people that are important to you how much you love them.

Happy Painting,

Mary

Sharing this piece with all my friend on my party page


Thursday

Funky Functional Art


I saw this idea once on another blog (it was a while ago and I don’t remember where I saw it otherwise I would give props I swear and if you have it on your blog please connect the link somehow) and always thought it would be cool to transform an old frame into a family organizational center ever since then. So when I saw this single mirror, unattached from its dresser at the local Rescue Mission, I knew I had to have it! At $5 it was total steel!


The first thing we did was remove the backing. Then we popped out the mirror and replaced it with luan.  We chose Luan plywood because it is more lightweight then regular plywood and since the frame itself is heavy we wanted to elevate any extra weight wherever we could.


Just a side note:  Lowes is really nice about cutting the wood to your specific measurements, so if you don’t have the equipment at home to cut it just have them precut the wood for you and it’ll be already for you to insert when you get home.


Okay another side note: The next time I do this project I think I will paint the board separately from the frame then attach the two pieces at the end but we were so excited to see how it looked put together that we assembled it first. This made it harder to paint along the inside edge, for both the frame and chalkboard. Dugh?!

After one coat of primer we applied two coats of Benjamin Moore Baja Dunes as the base coat to the frame and waited for it to thoroughly dry before we began the faux.


So while that was drying we started on our magnet/chalkboard. Before we had screwed the wood on we did manage to sand it down smooth but did forget to prime...oops! LOL! Can you tell we were excited about this! I’m surprised I remembered the pictures! Grrrr! Don’t you hate when you do that, forget a step!

ANYWAY!  The surface was smooth and the first coat (of 4) of the magnetic paint went on nicely. It took many coats of magnetic paint to create enough hold to secure even the thinnest magnet, even though the directions say 2 coats are enough. If you wanted to use larger magnets I’m thinking you would have to apply even more coats of the paint. And you can only use one coat of regular paint/chalkboard paint over the top because that too cuts down on its magnetism.


After a couple hours the frame was dry and I decided to start on the faux. I went back in with Ralph Lauren Glaze in Tea Stain ($3 on sale @ Home Depot, which stopped caring it so I grabbed the last cans they had!)  and distressed it. Honestly, it looked okay, but I wanted something darker I think, so I went in with actually stain for a more richer, deeper discoloration. I dipped my rag in Minwax (Mahogany) and rubbed that into the sunburst and around the edges for a more weathered look. Then I took gold & bronze Artists Metallic paint and dry rubbed that over the tops of the sun bursts only, just for added effect.


Have you ever used Google Translate? I love it! You just type in a word, a statement, poem or phrase and translate it into one of 20 different languages. I wanted to bring some of the black into the top of the piece to balance out all the black in the middle and bottom, so I thought a cool French statement across the top wood be just the thing I needed. “Life is a Journey” was the statement I chose and once I traced it on the top I painted it in with black paint balancing it all out.

Once the outside was finished we put the last coat of chalkboard paint on the center and conditioned it.


Third and final side note (promise!): If you don’t condition your board the first thing you write on the chalkboard will be “burned in” so to speak.  Although you’ll be able to wash it off you’ll always be able to see it on the board. So here’s how you condition: Take any old piece of sidewalk chalk and rub it all over the entire surface of your chalkboard. Make sure that you cover every inch thoroughly with the chalk. Once that’s done take a wet cloth and wipe it clean.


Now onto the bling! I bought a bunch of different knobs from Hobby Lobby (when they where half off). I staggered them in style and size along the bottom to create a “just found” look. I chose smaller knobs to offset the hook on the side for extra storage.


Once we screwed the knobs in we discovered we needed to cut the back off of the screws in order for the frame to lay flush against the wall. Heavy duty wire cutters did the trick.

In order to hang this piece the hardware had to be strong.  It did not have hardware from its previous life as a mirror so we had to put our own on the back. We drilled 2 hooks (eye screws) into the back of the frame and ran heavy duty wire through them, securing it around each loop.

We now have a fantastic, functional piece of art for the home that can cost you next to nothing to make.  The magnet & chalk board paint are on the more expensive side ($20.00 per qt.) but you only use a little bit for this project and will have plenty left over for many other crafty things. So, get creating people! I know I can’t wait to make another organizational center again, just picked up another lonely mirror this weekend!

Happy Painting!
Mary

I'm sharing this with my friends that are listed on my party page. Find it here.